前言 由于工作原因,接触一些 JavaFX 开发。最近产品的同学提到一个遗留已久的问题——在网站启动我们的 JavaFX 本地应用程序。于是就着手了解一下。曾经做过 Android 应用程序的 web 唤起功能。大致就是注册一个自定义的 Scheme,在 web 中嵌入这个自定义 Scheme 的 URL 唤起本地应用,就像 http:// 或 https:// 的 URL 可以唤起浏览器。桌面应用也可以通过同样的方式来启动。下面简单的记录一下实现过程。
以下文章中的代码可以在此免费下载:javafx-custom-url-scheme 。项目使用 maven 管理,使用 javafx-maven-plugin 插件打包 native 程序。结构如下:
1
2
3
4
5
6
7
8
9
10
11
12
13
14
15
├── README.md ├── javafx-custom-url-scheme.iml ├── pom.xml └── src └── main ├── deploy │ └── package │ ├── macosx │ └── windows ├── java │ └── org │ └── eirture │ └── javafx │ └── App.java └── resources
通过 URL 唤起 JavaFX Windows 应用 通过这篇文档 Registering an Application to a URI Scheme ,我们知道通过自定义 URI Scheme 唤起本地应用,需要添加如下注册表信息:
1
2
3
4
5
6
7
8
9
10
HKEY_CLASSES_ROOT myapp # 自定义协议的名称 (Default) = "URL:myapp" URL Protocol = "" DefaultIcon # 定义图标 (Default) = "javafx-custom-url-scheme.exe,1" # 图标路径,‘path,iconIndex’形式 shell open command (Default) = "C:\Program Files\javafx-custom-url-scheme.exe" "%1" # 定义应用程序路径地址, %1 表示接收一个参数。
下一步我们需要考虑在 JavaFX 程序中将此信息写入注册表。使用 javapackager 打包,我们会发现,windows 平台的 .exe 程序使用的是 InnoSetup,打包过程输出的信息提示我们,可以通过project/deploy/package/windows/AppName.iss 文件自定义打包的配置信息,在 InnoSetup 帮助文档 中不难找到添加注册表信息的方法。
第一个问题,我们从哪里获取 AppName.iss 配置文件呢。通过打包过程输出信息,我们发现,在 ~/AppData/Local/Temp/fxbundler* 目录下有我们要找的文件。不过这里面是根据我们配置的 javafxpackage 打包信息生成的配置文件,如果直接 Copy 过来,那么这些打包信息就不能根据我们的配置生成了。其实我们找到这个生成配置信息的模版文件放在此处即可: template.iss 。将 template.iss 放置 javafx-custom-url-scheme/src/main/deploy/package/windows/MyApp.iss,增加配置信息如下:
1
2
3
4
5
[Registry] Root: HKCR; Subkey: "myapp"; Flags: uninsdeletekey; ValueType: string; ValueData: "URL:myapp" Root: HKCR; Subkey: "myapp"; Flags: uninsdeletekey; ValueType: string; ValueName: "URL Protocol"; ValueData: ""; Root: HKCR; Subkey: "myapp\DefaultIcon"; Flags: uninsdeletekey; ValueType: expandsz; ValueData: "APPLICATION_NAME.exe,1" Root: HKCR; Subkey: "myapp\shell\open\command"; Flags: uninsdeletekey; ValueType: expandsz; ValueData: "{app}\APPLICATION_NAME.exe %1";
开始打包 native 应用程序(需要先确保已经安装了 innoSetup)
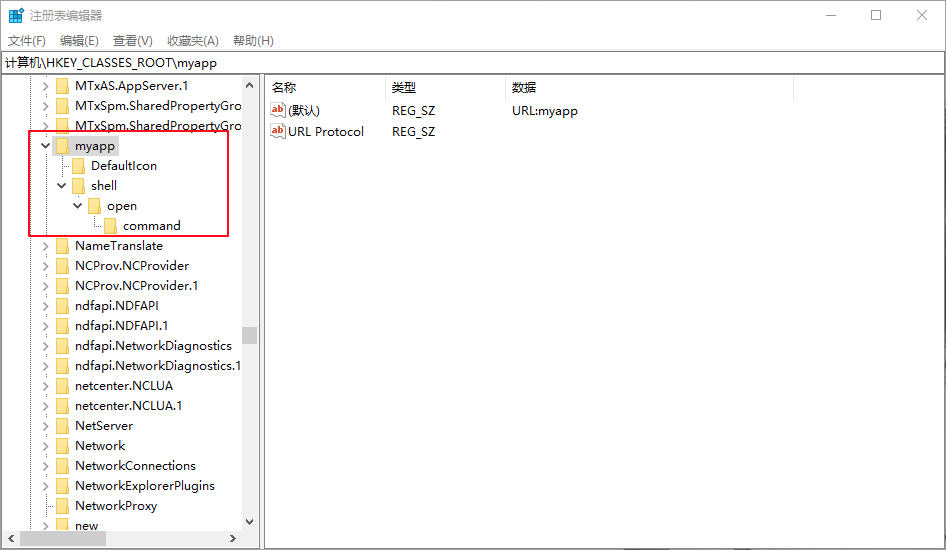
在项目的 target\jfx\native\ 目录下将会生成我们的应用程序 MyApp.exe,安装后会自动在注册表中写入自定义的 scheme 信息。如下图所示:
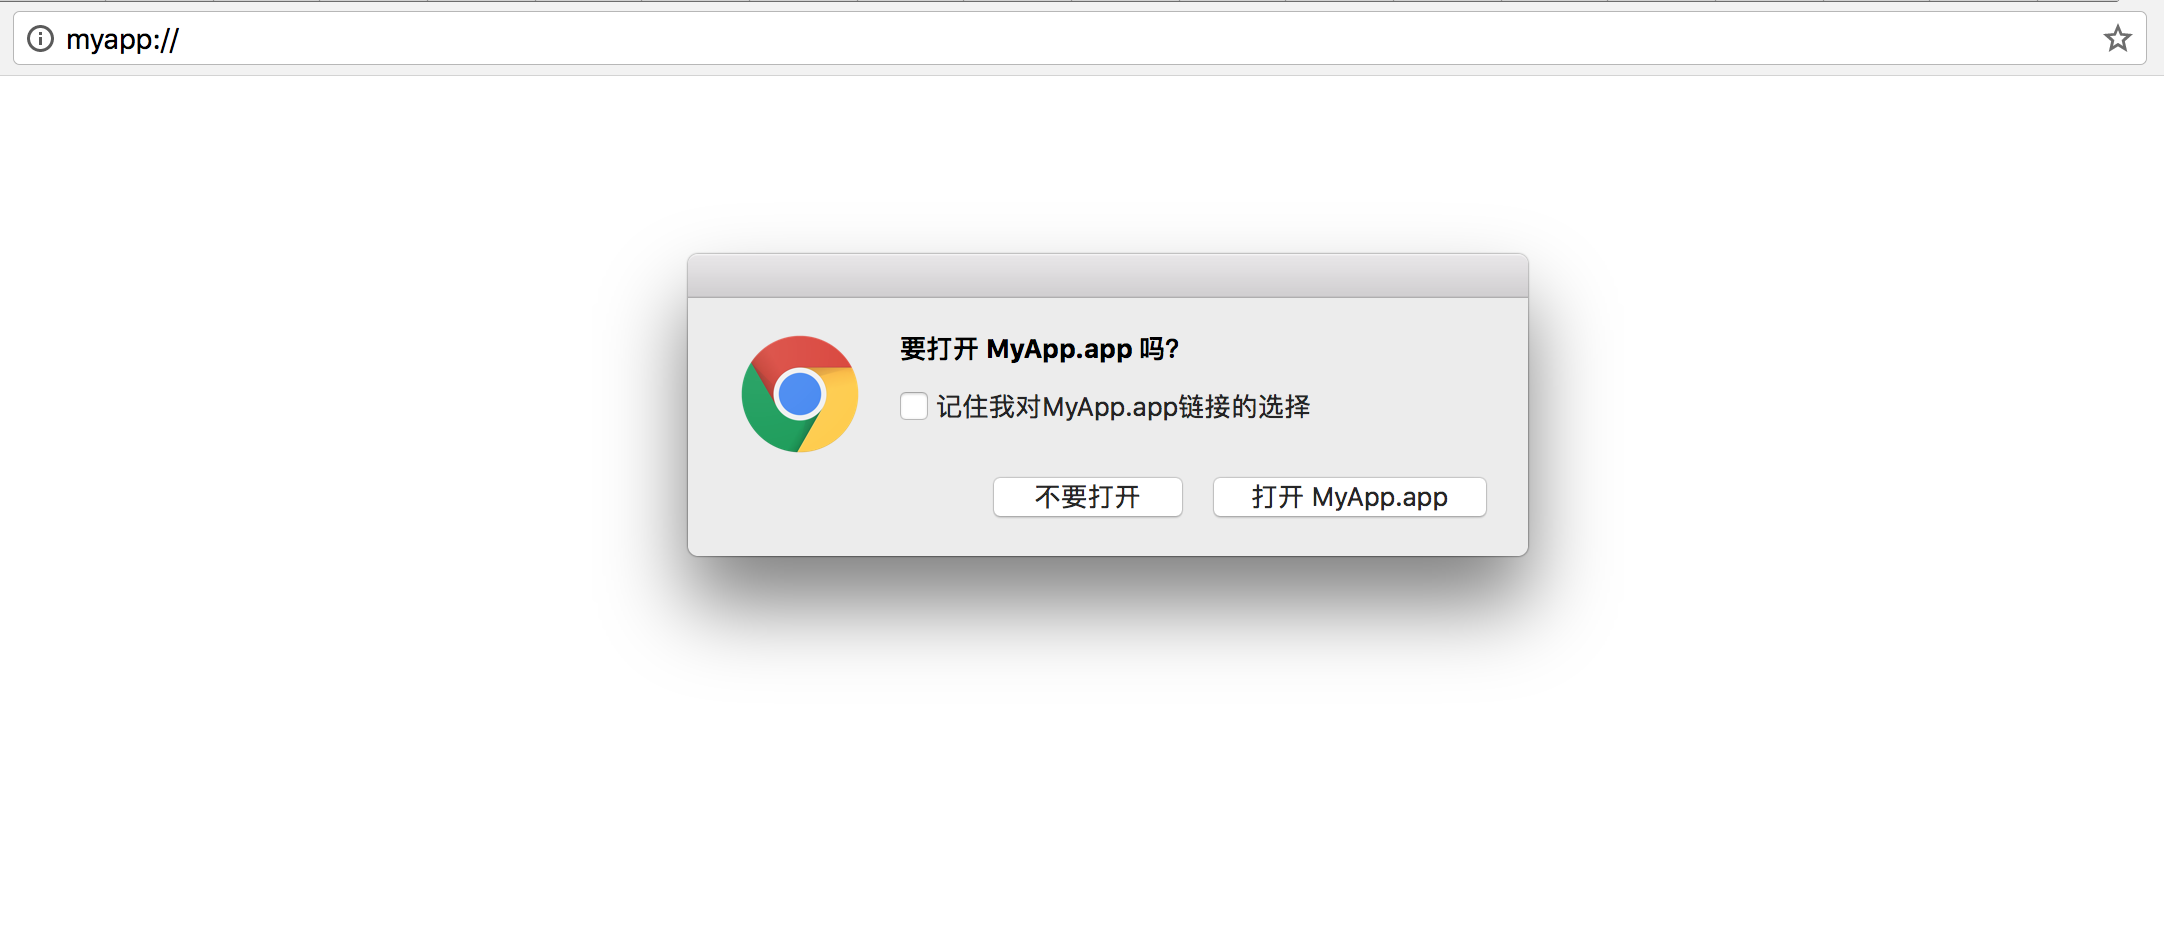
现在就可以在浏览器输入 myapp:// 启动 MyApp.exe 应用程序了。
通过 URL 唤起 JavaFX Mac OS 应用 MacOS 应用程序如何自定义 URL Scheme 的教程很多,在此我们也不过多介绍。需要在应用的 Info.plist 文件中添加如下配置:
1 2 3 4 5 6 7 8 9 10 11 <key > CFBundleURLTypes</key > <array > <dict > <key > CFBundleURLName</key > <string > org.eirture.javafx.App</string > <key > CFBundleURLSchemes</key > <array > <string > myapp</string > </array > </dict > </array >
我们需要解决的问题是,使用 javafxpackager 打包 JavaFX 应用程序时,如何在 Info.plist 文件中添加这些信息。在执行 mvn jfx:native 命令打包过程中,可以看到控制台输出了如下信息:
1
2
3
4
5
6
7
... Building DMG package for MyApp 正在准备 Info.plist: /var/folders/vy/hfcccjpx0xz3q53dvj32llmm0000gn/T/fxbundler8587227884586677537/macosx/Info.plist Using default package resource [包配置文件] (add package/macosx/Info.plist to the class path to customize) Using default package resource [icon] (add package/macosx/MyApp.icns to the class path to customize) Running [security, find-certificate, -c, Developer ID Application: , -a] ...
告诉我们将自定义的 Info.plist 文件放至 package/macosx/Info.plist 可以实现自定义。同 windows 下,我们需要放入模版文件,并在模版文件中加入我们自定义的配置信息。在 openjfx 项目中可以找到 Info-lite.plist.template 文件,并在文件中加入我们自定义的配置。
1
2
3
4
5
6
7
8
9
10
11
12
13
14
15
16
17
18
19
20
21
22
23
24
25
26
27
28
29
30
31
32
33
34
35
36
37
38
39
40
41
42
43
44
45
46
47
48
49
50
51
52
53
54
55
56
57
58
59
60
61
62
63
64
65
66
67
68
69
70
71
72
73
<?xml version="1.0" ?> <!DOCTYPE plist PUBLIC "-//Apple//DTD PLIST 1.0//EN" "http://www.apple.com/DTDs/PropertyList-1.0.dtd"> <plist version="1.0"> <dict> <key>LSMinimumSystemVersion</key> <string>10.7.4</string> <key>CFBundleDevelopmentRegion</key> <string>English</string> <key>CFBundleAllowMixedLocalizations</key> <true/> <key>CFBundleExecutable</key> <string>DEPLOY_LAUNCHER_NAME</string> <key>CFBundleIconFile</key> <string>DEPLOY_ICON_FILE</string> <key>CFBundleIdentifier</key> <string>DEPLOY_BUNDLE_IDENTIFIER</string> <key>CFBundleInfoDictionaryVersion</key> <string>6.0</string> <key>CFBundleName</key> <string>DEPLOY_BUNDLE_NAME</string> <key>CFBundlePackageType</key> <string>APPL</string> <key>CFBundleShortVersionString</key> <string>DEPLOY_BUNDLE_SHORT_VERSION</string> <key>CFBundleSignature</key> <string>????</string> <!-- See http://developer.apple.com/library/mac/#releasenotes/General/SubmittingToMacAppStore/_index.html for list of AppStore categories --> <key>LSApplicationCategoryType</key> <string>DEPLOY_BUNDLE_CATEGORY</string> <key>CFBundleVersion</key> <string>DEPLOY_BUNDLE_CFBUNDLE_VERSION</string> <key>NSHumanReadableCopyright</key> <string>DEPLOY_BUNDLE_COPYRIGHT</string> <key>JVMRuntime</key> <string>DEPLOY_JAVA_RUNTIME_NAME</string> <key>JVMMainClassName</key> <string>DEPLOY_LAUNCHER_CLASS</string> <key>JVMAppClasspath</key> <string>DEPLOY_APP_CLASSPATH</string> <key>JVMMainJarName</key> <string>DEPLOY_MAIN_JAR_NAME</string> <key>JVMPreferencesID</key> <string>DEPLOY_PREFERENCES_ID</string> <key>JVMOptions</key> <array> DEPLOY_JVM_OPTIONS </array> <key>JVMUserOptions</key> <dict> DEPLOY_JVM_USER_OPTIONS </dict> <key>ArgOptions</key> <array> DEPLOY_ARGUMENTS </array>DEPLOY_FILE_ASSOCIATIONS <key>NSHighResolutionCapable</key> <string>true</string> <!-- custom configuration --> <key>CFBundleURLTypes</key> <array> <dict> <key>CFBundleURLName</key> <string>org.eirture.javafx.App</string> <key>CFBundleURLSchemes</key> <array> <string>myapp</string> </array> </dict> </array> </dict> </plist>
重新打包安装,即可在浏览器通过 myapp:// 唤起我们应用程序了。
总结 终于我们实现了从 web 页面唤起 JavaFX 本地应用程序功能。各个平台上实现自定义的 URL Scheme 的教程都很多,在此主要是想分享使用 JavaFX 开发,如何配置此功能。当然,这里仅仅是通过自定义的 URL Scheme 唤起本地应用程序。我们还可以使用自定义的 URLSchemeHandler 接收来自 URL Scheme 的参数,例如通过 myapp://user/eirture 给本地应用传递 user/eirture 信息等。


